Saturday, October 29

Roasted Tomato Basil Soup

This was so good and perfect for the recently cooler weather! I could have eaten the roasted tomatoes straight off of the baking sheet.
Roasted Tomato & Basil Soup
recipe & bottom image from SpoonForkBacon
Makes 7 cups 
INGREDIENTS
1 ½ lbs Roma tomatoes, sliced lengthwise
3 tablespoons extra virgin olive oil
2 tablespoons unsalted butter
1 medium yellow onion, diced
4 garlic cloves, minced
1 tablespoon fresh thyme, minced*
1 (28 ounce) can crushed tomatoes
2 cups basil leaves, roughly chopped
2 tablespoons dried basil*
1 tablespoon sugar
2 cups low sodium chicken broth
salt and pepper to taste
2/3 cup heavy cream {I did not have cream. I mixed in about 4 oz cream cheese but thought it was great without it}
garnish:
basil
feta cheese, crumbled.
*I did have fresh basil but not fresh thyme or dried basil. I used extra fresh basil and about a 1/2 tablespoon Italian spice mix.
DIRECTIONS
1. Preheat oven to 375°F.
2. Spread tomato halves onto a baking sheet and drizzle with olive oil. Season generously with salt and pepper.
3. Roast tomatoes for about 1 hour.
4. While tomatoes are in the oven, melt the butter in a large pot over medium-high heat.
5. Add onion and sauté for 5 minutes.
6. Stir in the garlic and thyme and sauté for another 5 minutes.
7. Add crushed tomatoes, basils and sugar. Season with salt and pepper.
8. Stir the mixture and reduce the heat to medium or medium-low and simmer for 10 minutes, covered.
9. Pour broth and roasted tomatoes into the pot. Season with salt and pepper.
10. Continue to simmer soup, covered, for about 30 minutes, stirring occasionally.
11. Carefully pour soup into a blender and blend until smooth. {Immersion blender party! Get one!}
12. Pour soup back into the pot and stir in the cream until fully incorporated.
13. Simmer the soup for 3 minutes before ladling into bowls.
14. Top each soup with a sprinkle of feta cheese and basil and serve hot.

Monday, September 19

asian haricot vert salad

Just threw together a yummy and easy modification of this salad.  Serving this with pork tenderloin, marinated in a Ginger Lime Vinaigrette marinade, seared briefly on high heat on all sides in an ovenproof skillet then baked till 145 degrees. Reducing leftover marinade in the same skillet mixed with some spicy mustard for a sauce.

Asian Dressing to coat 3 to 4 cups steamed fresh green beans
whisk together:
2-3 teaspoons champagne vinegar
2-3 teaspoons olive oil
2-3 teaspoons spicy mustard
a few dashes of pepper and coarse salt
1 teaspoon freshly grated ginger {hello cheap little tiny chunk from Whole Foods!}
1 tablespoon Asian Spice Mix (such as Adams Reserve Asian Spice rub which is a mixture of sesame seeds, garlic, sweet pepper, red pepper and green chili pepper flakes, turmeric and garlic)

good warm and also chilled!

Sunday, September 11

Eggplant Caponata

Another veggie dish! I had been wanting to cook eggplant more and try another, more summery way of cooking squash besides roasting it. Because I freeze my herbs, it wasn't a problem to use the fresh herbs this called for, and I knew the combo of sauteeing and balsamic vinegar had to be a winner.


My only beef with this recipe was that even though I reduced the portions to about 2/3 of the recipe, I still couldn't do it all in one skillet. Next time I'll make a smaller quantity or just use the same skillet twice rather than having two going simultaneously.


You don't have to use heirloom tomatoes --they're pricey. I used one heirloom tomato and one really ripe beefsteak tomato. This dish alone would have cost about 12 bucks had I bought two big heirloom tomatoes. Bet this would be a great dish to make after hitting up the farmer's market though!


Eggplant Caponata
from happyyolks
INGREDIENTS
1 lb eggplants {I used the long, skinny ones}
¼ cup olive oil
1 chopped yellow onion
2 cloves garlic, minced
2 large heirloom tomatoes, in chunks
3-5 yellow squash, into bite-sized chunks
2 cups crimini mushrooms, quartered
2 teaspoons balsamic vinegar {don't skimp!}
1 cup chopped flat-leaf parsley
1 cup chopped basil
salt and pepper, to taste

DIRECTIONS
Prepare the eggplant first by chopping the bulbs into bite sized chunks, and sprinkling with salt in a strainer. {Many chefs say this draws out the eggplant’s bitterness.} Let sit while you prepare the squash, tomatoes, onion, and mushrooms. In a heavy skillet over medium-high heat, add 2 tbsp of olive oil and minced garlic to simmer. Add eggplant cubes and cook for 10 minutes, stirring occasionally, until browned and soft. Remove from heat. In a second large skillet {or the same one} over medium heat, add the remaining 2 tbsp olive oil and simmer onions until barely translucent. Add squash and mushrooms, sprinkle with salt and pepper and saute for 5 minutes. Add the tomatoes last along with the balsamic vinegar and simmer for 4-5 minutes. Remove from heat. {I would have done this all in the same skillet had there been room.}


Stir chopped basil, parsley, and a dash of salt and pepper over all veggies. 

Friday, August 26

Roasted Cauliflower with almonds, lemon and parsley

By halving the recipe but doubling the nuts, I could almost have eaten this as a main dish. It's from Ina Garten's The Barefoot Contessa:How Easy is That? I'm putting the recipe as it appears in the book and noting my thoughts and changes. I really liked this, the nuts, parsley and lemon are simple but make it really flavorful. I appreciated the mixing it all in the sheet pan plan, since I'm averse to making more dishes dirty than necessary. 


This just came about serendipitously when I saw cauliflower at the store and realized I hadn't had it in forever...took it home with no other plan aside from throwing it in my salads raw. Then I found this recipe, and am really glad I tried roasting something new. I think it's a good summer veggie roast.


Roasted Cauliflower
serves 4-6 {I halved this, except the nuts and lemon juice}
Ingredients
1 head garlic, cloves separated but not peeled
1 large head cauliflower, trimmed and cut into large florets
4 1/2 tbsp olive oil
2 1/2 tsp kosher salt
1 tsp ground black pepper
1/4 cup finely chopped flat-leaf parsley {chop then freeze! then thaw the amount you want on a paper towel for a few min}
3 tbsp pine nuts, toasted (I used about 1/3c. slivered almonds, toasting them in a dry skillet on medium for about 2-3 min, til browned and fragrant)
2 tbsp fresh lemon juice (I used it from a bottle)
Directions
1. Heat oven to 450 degrees* F. Bring a small pot of water to a boil and add the garlic cloves. Boil for 15 seconds; drain and peel. Cut the largest cloves in half lengthwise.
2. On a rimmed baking sheet, toss the cauliflower with the garlic, 3 tbsp olive oil, 2 tsp salt, and black pepper. Spread into a single layer and roast, stirring twice, until the cauliflower is tender and the garlic is lightly browned, 20 to 25 minutes*.
3. Transfer the cauliflower to a large bowl with the garlic and pan juices. Add the remaining 1 1/2 tbsp olive oil, parsley, pine nuts, and lemon juice. Sprinkle with 1/2 tsp salt, toss well and serve hot or warm. Serves 6.
*{note} This burned my garlic. Maybe I boiled them too long. Or maybe they were too small. I don't know if that boiling step was just to make them easier to peel (which was cool) or if it was to blanch them and get them cooking, fragrant a bit. It wasn't worth bringing a pot to boil for just easy peeling and I don't actually like eating entire heads of garlic even when they're not burned. I may chop the garlic when I try this again, or even use garlic powder (is that bad?) Watch it as it cooks if you do it Ina's way, because surely she knows what she's doing. Or consider roasting on 425 or 400.
{pictures credit} because her images were much better than mine.

Tuesday, August 16

balsamic haricot vert salad

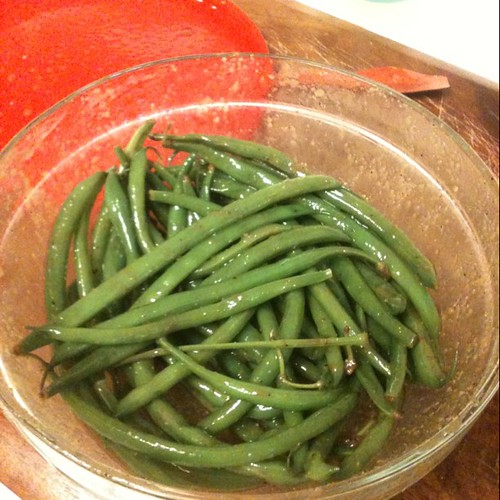
Green beans caught my eye at the store today. I think I'd been subconsciously dwelling on their fresh simplicity since enjoying a salad from a cute french bistro in Spokane last week. They were on sale and looked fresh, green and easy, so I grabbed a handful.


I could have put any sort of chopped toasted nuts in this. Maybe I'll do it again with chickpeas or fava beans. Anyway, this was easy and good.
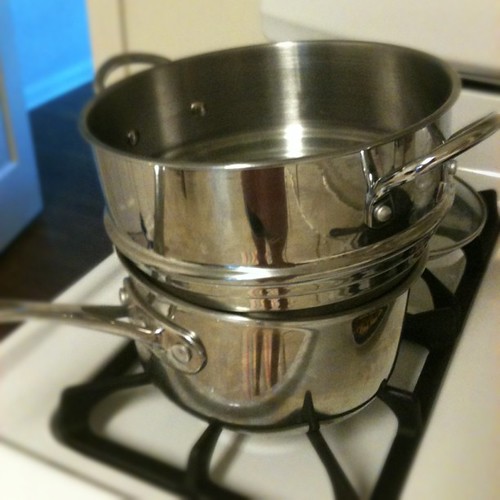
And I was happy to bust out my shamefully neglected steamer insert. Really, I should use this thing more. Clean up is a breeze too.


balsamic haricot vert salad
let's use the french name for kicks.
serves 2
INGREDIENTS
2-3 cups fresh green beans
{addition suggestion} pine nuts, slivered almonds, finely chopped pecans toasted on medium high in a dry skillet, stirring often 3-4 minutes until browned and fragrant


{dressing}
1 tablespoon olive oil
1 tablespoon balsamic vinegar
a couple generous dashes of pepper and garlic powder
a dash of ginger
2 teaspoons spicy mustard {the stuff with horseradish}


DIRECTIONS
Steam beans until cooked and tender but still maintaining a bit of a crunch, about 4-5 minutes. Toast nuts if you're using them. Whisk together dressing ingredients. Toss  dressing with beans, nuts and whatever else you feel like throwing in there. Good warm. Good cold.

Wednesday, July 13

stuff your salad in a tomato

Tomatoes are huge and inexpensive right now, and I've been looking for ways to mix up my habitual lunch salad with toppings like tuna and a bunch of different types of beans, but when I picked up a Runner's World magazine while I was at the airport this weekend, I was inspired by a bunch of their great recipes. Who knew they'd have recipes? Guess I shouldn't be that surprised, but I was quite impressed.... 


Among other healthy, fresh, balanced and light recipes was one for a stuffed tomato. I found a bunch of varieties on stuffed tomatoes when I went to Runner's World's site to look for the recipes ones I'd seen in the magazine and now plan to chop up my salads and try a few of these variations among others on their site. Maybe they will come up with a cheap {and non-clutter causing}Nook version of the mag so I don't drown us in magazines saved merely for their recipes. Image belongs to foodstuff, who also has a great looking recipe.

Saturday, June 25

farmer's market lunch. farmer's market salsa


I've been making my own salsa recently. I use it sometimes as salad dressing and sometimes when I make a couple corn tortilla chips for a midafternoon snack. I've used canned diced tomatoes because I had tons of them, but it's obviously great with higher quality tomatoes, especially those that are about to be a little too ripe to enjoy on your salad. 

The farmer's market today was crazy with peppers, tomatoes, cucumbers and of course peaches. One stand was giving away cucumbers! Sliced salted cold cucumbers is one of my favorite summer snacks so I will certainly be enjoying that this week...

I had a little over a pound of tomatoes in my bag so they threw in a handful more to make it at least 2 pounds, though I'm sure it was more, and gave it to me for an even $2. I will be baking them in big slices, maybe attempting a summer tomato feta tart similar to this one, this one or this one, and of course eating them raw with salt and pepper and enjoying them in this salsa I just made. Yessss.

Salsa is flexible. Throw in whatever you have. I had onions and tomatillos already so I used:

the ripest tomato in the lot + one and a half tomatillos + a fourth of a large white onion. I also seeded and added half a jalepeno + a half a serrano pepper + fourth of a poblano pepper. Plus a dash of white vinegar + a dash of lime juice + a few generous sprinkles of salt. 

Process it all in a food processor. Eat.

It turned out pink! I really like the taste of tomatillos in salsa, Chuy's uses them. When I asked about cilantro, they said it's dried up in the heat, as had mine. So no cilantro in my salsa.


If you've never shopped a farmer's market, you're missing out! If nothing go for the experience. It's really fun to see and talk to the people who live and work around the food they produce. Oftentimes families are there selling their goods. You'll find great fresh juices and baked goods such great breads and baked goods handmade soaps, cheeses, herb mixes, candles. Samples of it all galore and of course great produce. I think a gentleman literally gave me the equivalent of a loaf of bread in all his variety of samples he was enthusiastically explaining and handing out. So fun. 

Some of it may be more expensive than the grocery store, cantelopes and watermelons were today, but a lot of it isn't and it's all much better and more fresh, my huge $2 bag of tomatoes, $5 bin of peaches and $2 bunch of kale for example. Plus it's fun to support the people who grow food locally and now that it's moved right down the street from me, I need to go more. I'm suuuuper excited about my farm fresh eggs! They were $5 a dozen, though, so part of me hopes I don't like them too much...

Monday, June 20

Pan Roasted Pork Tenderloin + Veggies

 My husband is the master of last minute dinner decisions. My freezer and I have become fast friends. I use my cast iron skillet to cook a variety of frozen vegetables often. For our anniversary, I did a one skillet pork tenderloin and vegetables. Marinating for a long time, searing well on all sides and removing when it was @ 145 degrees made for a great, tender piece of meat with a yummy, shreadable, well seared outside. Plus, can't beat that one pot clean up business. Especially when it's a cast iron skillet, I literally rinse it and wipe it clean.


ONE Pan Roasted Pork Tenderloin and Veggies
INGREDIENTS
1 medium sized pork tenderloin {I'm sorry, I truly have no clue how many pounds ours was...}
a thick Asian dressing or marinade of choice. I used Cookwell & Company Asian Ginger Vinaigrette.
3 cups frozen vegetables such as brussels sprouts, broccoli florets, or green beans
2 tablespoons olive oil {learned that extra virgin is not ideal for skillet cooking because it burns at a lower temperature. find just olive oil for skillet cooking. HEB makes some that’s labelled for sautéing.}
Cracked pepper
Coarse kosher salt
balsamic vinegar

DIRECTIONS
Trim ends off of tenderloin so it is uniform thickness. Cut in half. Marinate in the fridge overnight, well coated. Remove from fridge 30 minutes prior to cooking and pat dry.
 
Thaw vegetables by running warm water over them in a colander or allowing them to sit about 5 minutes in warm water. Cut the brussels sprouts in half. 

Preaheat oven to 425 degrees. Film an ovenproof skillet with oil and sear the tenderloin over medium high heat to brown all sides, about 5 minutes in all.

At the same time meat is browning, add vegetables and generously sprinkle with pepper and salt. Lower heat if things get splattery. Stir to coat and allow to sit undisturbed as meat browns, only stirring once or twice. Sprinkle balsamic vinegar over the vegetables and toss to coat.

Place skillet in the oven and roast 15-20 minutes until internal temp is 145 degrees. Tent skillet with foil and let rest about 5 minutes. Use more of your marinade as a glaze or make a pan sauce by deglazing the skillet with chicken broth, wine or something like orange juice.

Here's the basic recipe I use to cook vegetables @ the last minute.
Just Freezer Skillet Veggies
INGREDIENTS
3 cups frozen vegetables such as brussels sprouts, broccoli florets, or green beans
2 tablespoons olive oil {learned that extra virgin is not ideal for skillet cooking because it burns at a lower temperature. find just olive oil for skillet cooking. HEB makes some that’s labelled for sautéing.}
Cracked pepper
Coarse kosher salt
balsamic vinegar

DIRECTIONS
Thaw vegetables by running warm water over them in a colander or allowing them to sit about 5 minutes in warm water. Cut the brussels sprouts in half. Heat oil in metal or cast iron skillet on medium high. Add vegetables and generously sprinkle with pepper and salt. Lower heat if things get splattery. Stir to coat and allow to sit undisturbed about 2-3 minutes. Stir again and leave alone for a few more minutes. Once they are looking cooked, sprinkle with balsamic vinegar, stir to coat and cook about 2 -3 minutes more, stirring infrequently to allow maximum, flavorful browning.

Remove from heat. Cool. Plate. Sprinkle with a bit more salt and pepper.

Thursday, June 16

almost no knead bread

Bread strikes again. I've been eating this for two days straight. Toast a slice. Little honey. Little butter. Best crust and super moist. probably because I accidentally tripled the beer. Which should go to show you that bread is forgiving. You can't screw it up. It will probably be different every time depending on how long and at what temperature it rose, but it will always taste good. Especially right out of the oven.

 
Best when baked in a dutch oven. Best way to get heat and steam needed for good rise and the perfect crust.
almost no-knead bread
makes one delicious loaf. from america’s test kitchen via pete
INGREDIENTS 
3 cups unbleached all-purpose flour (15 oz), plus additional for dusting work surface I used bread flour
1/4 tsp instant or rapid-rise yeast (or 1/2 tsp dry active yeast)
1 1/2 tsp table salt
3/4 cup plus 2 Tbsp water (7 ounces), at room temperature
1/4 cup plus 2 Tbsp mild-flavored lager (3 ounces) {I accidentally used 3/4 cup + 2 Tb! Used Shiner's Black Lager. The dough was crazy sticky and hard to manage but it turned out fine and was super moist. May never try it the right way...}
1 Tbsp white vinegar
DIRECTIONS
whisk flour, yeast, and salt in large bowl. add water, beer, and vinegar. using rubber spatula or a wooden spoon, fold mixture, scraping up dry flour from bottom of bowl until shaggy ball forms. cover bowl with plastic wrap and let sit at room temperature for 8 to 18 hours.

lay 12- by 18-inch sheet of parchment paper inside 10-inch skillet and spray with nonstick cooking spray. transfer dough to lightly floured work surface and knead 10 to 15 times. shape dough into ball by pulling edges into middle. transfer dough, seam-side down, to parchment-lined skillet and spray surface of dough with nonstick cooking spray. cover loosely with plastic wrap and let rise at room temperature until dough has doubled in size and does not readily spring back when poked with finger, about 2 hours.

About 30 minutes before baking, adjust oven rack to lowest position, place 6- to 8-quart heavy-bottomed dutch oven (with lid) on rack, and heat oven to 500F. lightly flour top of dough and, using razor blade or sharp knife, make one 6-inch-long, 1/2-inch-deep slit along top of dough. carefully remove pot from oven and remove lid. pick up dough by lifting parchment overhang and lower into pot (let any excess parchment hang over pot edge). cover pot and place in oven. reduce oven temperature to 425F and bake covered for 30 minutes. remove lid and continue to bake until loaf is deep brown and instant-read thermometer inserted into center registers 210 degrees, 20 to 30 minutes longer. carefully remove bread from pot; transfer to wire rack and cool to room temperature, about 2 hours.


If you note that mine has a weird shape, it's because I did not have parchment paper so I used my Silpat mat. The sturdiness probably helped my gooey dough. Further proof that you can't mess it up. Try it!

Wednesday, June 15

french baguettes

I made bread and it was heavenly. It made my house smell great. It was killer straight out of the oven, with butter and honey, and now I'm hooked. I can't figure out what website this recipe came from, but I just printed nearly every bread recipe over at pete bakes and can't wait to try them all. I've come a long way and so can you! Do not be scurred.


{french baguettes}
adapted from artisan breads every day by peter reinhart
INGREDIENTS
5 1/2 cups unbleached bread flour
2 tsp salt or 1 tbsp kosher salt
2 1/4 tsp instant yeast
2 c. lukewarm water {about 95 degrees. Tap water that feels just warm to the touch is fine}
DIRECTIONS
{prep day} combine all ingredients in bowl of mixer with paddle attachment and mix on lowest speed for 1 minute until well blended and smooth. Dough should form a coarse, shaggy ball. Let rest uncovered for 5 minutes. Switch to dough hook and mix on medium low speed for 2 minutes. Dough should be smooth, supple and tacky but not sticky.

Knead dough by hand on lightly floured work surface for 1 minute, then transfer to a large, clean, lightly oiled bowl. Cover with plastic wrap and immediately refrigerate overnight or up to 4 days.

{baking day} remove dough from refrigerator 2 hours prior to baking. Gently transfer to lightly floured work surface. Divide dough into 10 ounce pieces for baguettes. Just divide the dough in fourths if you don't have one but Yes! I bought a $7 kitchen scale for this. I had four 10 ounce balls and then a little 5 ounce one leftover.

Form baguettes: by batting each piece of divided dough into a thick rectangle. With the long end facing you, fold the bottom half to the center and seal the seam. Fold the top half to the center and once again seal the seam. Roll the top half of the dough over the seam to create a new seam on the bottom of the loaf. Rock loaf back and forth with hands moving out toward and increasing pressure at the ends, to slightly taper the loaf until baguette is length of your baking sheet (or baguette pan if you have one).

Mist top of dough with spray oil, loosely cover with plastic wrap and proof and room temperature. Make a "couche" by placing baguettes on a clean towel dusted with flour, bunching up fabric between each loaf to create walls for support. Proof for about 1 1/2 hours or until they have increased to  1 1/2 times their original size.

Prep for baking: About 45 minutes before baking, preheat oven to 450 degrees. Place a rimmed sheet pan which will serve  as the steam pan on the shelf under which the baguettes will be baked. Remove plastic wrap from the dough 15 minutes prior to baking. Gently roll dough onto baguette pan or baking sheet. Just prior to baking score the dough 1/2 inch deep with a serrated knife. Transfer loaves to oven, pour 1 cup hot water into steam pan. Wear an oven mitt & be careful, the steam will be steamy in the hot pan. Warmed the water in my stovetop kettle and poured it in so there was some distance.

Bake for 12 minutes, then rotate pan and bake for another 15-25 minutes until the crust is rich golden brown and the loaves sound hollow when thumped, and the internal temperature is about 200 degrees. Coll on a wire rack for at least 35 minutes before slicing or serving. good luck with that. Store wrapped in a dish towel to maintain crust's crispiness.

Thursday, June 2

banana bunchaheartysoundingstuff pancakes

This is what I made for breakfast this morning. If you're a light, fluffy buttermilk pancake person, sorry. These were fluffy for sure, but they're more on the hearty side. By now you surely know about the seriousness with which I approach my breakfasts. In my opinion frozen bananas, frozen right when they're turning brown and would be just a bit too overripe to eat, are best for baking. I set these out to thaw for about an hour and a half then peeled them into the bowl. Trying not to think about how slimynasty they looked...They're so easy to mash and provide a bit more moisture to a recipe like this with a bunch of dense stuff. Anyway, these are filled with protein and fiber. Check out how good for you wheat germ is. But the banana and agave nectar I tried out as syrup provide ample sweetness and flavor, in my book at least.


And you must sing the song of course.

Erin's Banana flaxbranoatwheatandbunchaheartysoundingstuff Pancakes
adapted from here and here.
INGREDIENTS
2/3 cup old fashioned oats
1/3 cup whole wheat flour
3 T. wheat germ
1 c. milk I used almond milk bc that's what I had.
3 t. flax seeds
2 t. baking powder
1/4 t. baking soda
1/4 t. salt
1/2 t. cinnamon
1 t. vanilla extract
1 egg beaten
2 very large, very ripe bananas, mashed well (or thawed from frozen is better)
2 T. olive oil
DIRECTIONS
In a cup or small bowl, pour 1/3 cup of your milk over the wheat germ and let sit. Process the oats in a blender or food processor until they resemble a coarsish flour. Sift together flour, cinnamon, baking powder, soda & salt in to a large mixing bowl. Add oat flour. Sifting the w.w. flour helps it get fluffy and whole wheat tends to be more coarse anyway. (Once I run out, I'm getting whole wheat cake flour) supposedly that's the way to go to get your whole wheat flour baked goods to stay fluffy, less coarse, more similar to white flour. Whisk together beaten egg, banana, oil and vanilla until well combined. I beat my egg into my mushed banana, shhh don't tell, bowl minimization. Whisk in the soaking milk with wheat germ. Add dry mix, combine, and let sit for five minutes. Heat griddle or cast iron skillet to medium or medium low. It's ready when droplets of water bounce on it. Cook pancakes. They'll cook slower than regular pancakes. I kept my skillet on medium low, otherwise the outsides get to crisp before the middle is cooked. Add more milk or water if the batter gets too thick. Serve topped with peanut butter and agave nectar as syrup. yum.

Friday, May 6

roasted shrimp

Umb. I'm dumb. Where has this been? I'm sure I own the Ina Garten cookbook that it's in. As in, for the last three years this recipe {or rather this simple 8 minute interaction between a hot oven and four household staples} has been sitting in my kitchen, in painfully close proximity to the freezer which houses an old, colossal and overly ambitions, never ending bag of frozen shrimp.

Le Sigh. Despite the time it took, I'm so glad cute Little Kitchen could bring it to the forefront of my Google Reader so that at least, albeit feeling like an idiot, I could at least come out of the cave I've been living in, begin to enjoy this and make some more room in my freezer. Or maybe not since I'll probably go to Costco for an elephant sized bag later today.

This. Is. So. Good. So versatile. So stinkingfrikinannoyingly simple. Be generous with your oil, salt and pepper and use good olive oil. Eat these babies alone, chopped up on salads, thrown into summer pastas, make little ceviches.


Roasted Shrimp
via The Little Kitchen that Could {to whom the pic belongs} from Ina Garten
{Ingredients}
2 lbs. large shrimp (15-20 count), peeled and deveined with tails left on
3 Tablespoons olive oil
1 Tablespoon coarse kosher or sea salt
1-2 teaspoons freshly ground pepper
1 teaspoon Old Bay blackening seasoning is also good if you have it
{Directions}
If your shrimp were frozen, as mine were, easily thaw them by running them under lukewarm water in a colander or setting them in a bowl of lukewarm water for 5 minutes or so. They are then easy to peel if they aren't already.
Preheat oven to 400 degrees. Cover a baking sheet with foil. Toss shrimp with olive oil, salt and pepper and spread in one layer.  Roast for 8 minutes or just until pink and cooked through.  Set aside to cool.  Serve warm or at room temperature, on top of salads, mixed in pasta, or even in warmed corn tortillas with some fresh pico de gallo, cilantro, maybe some chopped mango, cabbage, and a little chipotle mayo.

Thursday, May 5

steel cut oats

It has been unseasonably cold (at least in my opinion) the last couple days. Monday's high was only about 58 and it's been in the 40s in the mornings. I wore gloves at my workout this morning! 

Feeling cold and also a little blah with my typical breakfast, I thought something warm sounded lovely alongside my eggs, rather than cold cereal. Perfect time to try steel cut oats. I found that a little bit goes a long way; they are hearty, and they can be creamier yet still have a crunch to them --I like that texture --unlike regular oatmeal.


They do take longer to cook; many recipes call for soaking them first. I found a recipe where it can be done in a larger batch and cooked more quickly in smaller quantities in the morning. You make the amount you want each morning and store the remainder in the refrigerator.

steel cut oats breakfast
adapted from the bitten word and the ny times. pic belongs to the bitten word 
{Ingredients}
water
milk or almond milk
1 cup steel cut oats
wheat bran
flax seeds
honey, agave nectar or sugar
fruit

{Directions}
bring 2 cups water to a boil. pour boiling water over 1 cup steel cut oats into a heat safe (such as glass) storage container. stir and let sit covered overnight. 

In the morning, stir the mixture. Into a large microwave safe bowl, {or you can do this over the stove, but I prefer to get less vessels dirty}  combine 1/3 cup soaked oats, 1/4 cup water and 1/4 cup milk or almond milk. I also add 2 teaspoons wheat bran and 2 teaspoons flax seeds.

Microwave a total of about 4 minutes, stirring once or twice.
You want it to come to a boil and ideally simmer for most of this time, but I typically have to stop and stir it initially once or twice to keep it from boiling out of my bowl. {Which is why simmering the mixture stovetop would be better. Especially if you don't have my ridiculously oversized Pottery Barn cereal bowls. But also more effort.}

Once the liquid has lessened and it's looking like oatmeal, you're good. Add more milk for desired creaminess, or to help it cool faster.
As for toppings, I like about a teaspoon of agave nectar, half a banana and some raisins. Though the pic below via here, looks like a great variation I may need to try!


By the way, thanks Liz! I think "Bird's Nests" is a much cuter name than Egg In a Hole!

Friday, April 1

egg in hole

I love breakfast.


True story. I eat an egg every morning. I usually scramble it in a mug {one egg. one mug. pam spray. scramble with little whisk. 19 seconds zap. more scramble. 15 seconds zap.} but I love ordering eggs over easy with toast when I eat out for breakfast, loving soaking up that runny oak with some good bread, but resigning myself to my inability to make a fried egg well.

Well.
Enter Egg in A Hole.
INGREDIENTS
one egg
one good piece of toasted bread. like 9 grain.
olive oil cooking spray
biscuit cutter
DIRECTIONS
Heat skillet to medium high. Cut a hole in your toast with the biscuit cutter and ready the leftover circle on plate. Spray skillet with cooking spray. Add holed toast and crack egg into hole. Wait 2 minutes and swiftly flip entire unit. After 2-3 minutes, remove to plate. Sprinkle with coarse salt and cracked pepper and enjoy making perfect bites of cooked egg white, runny oak and nutty bread.

Monday, March 28

sliders

After a long and undoubtedly reader-mourned hiatus, I return to you with a versatile, well loved dish in our house.

The base of these sliders is Sister Shubert's rolls. Discovering that my husband loved these was further affirmation of my theory that I'd married the male version of my best friend, but that's beside the point. All that matters is T. loves the rolls and thus has loved whatever I'm able to fit in them. I've made steak sliders with leftover sliced steak meat, I've made turkey burger sliders with leftover turkey meat {and a really cute 2 inch biscuit cutter} and I've made fajita sliders. You could use black bean veggie burger patties, chicken breast sliders {cue that cute biscuit cutter} or even thickly sliced roast beef or turkey deli meat. The possibilities are endless, but the steak is is the one I make the most often. The pictures are of the turkey burger sliders.

{Steak sliders}
INGREDIENTS
Sister Shubert's Parker House Rolls
sliced steak or other meat of choice
spicy mustard
pesto
provolone cheese
baby spinach leaves
sliced Roma tomatoes
oven or toaster oven with a broiler
pepper

DIRECTIONS
Yield note: {I think there are about 16 rolls in each package. When I make these just for T, I break the frozen biscuit 'disk' in half and only use half at a time. One package should feed two for a main course comfortably and be great for appetizers for 4}
Cook frozen rolls according to package directions. Then turn broiler on. 
Time spend under the broiler will only melt the cheese not warm the meat sufficiently, so if you're using leftover or chilled meat, warm meat separately @ this point.
Half each roll and generously spread pesto on one side and spicy mustard {to your level of spiciness preference} on the other. I put pesto on the top and mustard on the bottom because I like the idea of the meat touching the spicy mustard...
Cover each bottom half with as much meat as you please and top with cheese. Place open faced halves on a cookie sheet under the broiler until the cheese melts. Remove. Sprinkle pepper on melted cheese. Top cheese with a few baby spinach leaves and a slice of Roma tomato {and whatever else you've got going on in the fridge that you think sounds good}
Smash top {pesto covered} half on. I served my turkey "burgers" with roasted new potato "fries."


Happy sliding!

Tuesday, January 18

briebruschetta

I bought brie for myself and needed to do something else with it after eating it on bread with chipotle raspberry sauce for two days straight. I also had some sad looking tomatoes, looking on the extra juicy side.


Do all my recipes seem to originate with stories of how I'm trying to get rid of leftovers or clean out the dregs of my pantry and freezer? Evidently.

Brie Bruschetta
{ingredients}
3 cloves garlic
good olive oil
good fresh bread such as ciabatta, 10-12 slices
two ripe tomatoes
4 oz of brie
cracked pepper
italian seasonings
{directions}
In a small ramekin covered with foil, bake 3 finely diced cloves of garlic in about an inch of olive oil for 15 minutes in a 400 degree oven. Then put the oven on broil and move a rack close to the broiling coil. Under the broiler, toast one side of your bread slices on a baking sheet

Half the tomatoes and generously rub the cut side on the untoasted side of the bread slices. Basically, you want the tomato to soak into the bread. Brush the baked garlic oil on the slices, sprinkle with Italian spices and cracked pepper. Spread on the brie, or place on thin slices, if spreading is difficult.

Broil the slices until cheese is melted and edges of bread begin to look toasted. About 2-3 minutes.

Enjoy!

Tuesday, January 11

blackberry fage

Operation Clean Out Freezer and Pantry is in full force.

After the pasta frozen fruit is next on the hit list. I have frozen cranberries, peaches, blackberries and strawberries. Since this stuff isn't in season anyway, now is a great time to start using it!

{blackberry yogurt}
heaping 1/2 c. frozen blackberries
1 c. greek yogurt
2 T. granola (or Grape Nuts - if you're in OCOF&P)
2 t. honey

Heat blackberries in a coffee mug for 1-2 minutes in the microwave until thawed. To thawed berries (and resulting liquid that I kept for sweetness) mix yogurt, granola & honey.

Sunday, January 2

cheesy tomato penne bake

This was a combination of a few recipes from my new The Complete Vegetarian cookbook I found for half off at B&N yesterday. It has TONS of great sauce recipes, pasta recipes, appetizer, stuffed vegetable recipes and a billion different ways of incorporating nuts and beans into recipes. Not that I'm a vegetarian per say, but I like eating nuts, vegetables and beans more than meat, typically, and the typical meat portions are hard to cook for just the two of us.

Anyway, I added ground turkey I had frozen from another dish to this recipe, used a tomato sauce recipe from the book and made a really easy cheese sauce to hold it all together. The cookbook's author, Rose Elliot, used the cheese sauce in a couple of her lasagna dishes, but called for egg to hold her penne bake together. (However, I buy good, expensive eggs to eat for breakfast and quite honestly didn't want to use up my good eggs on a baked pasta dish) I had tons of cheddar cheese I was ready to use up and had been wanting to make my own tomato sauce for a while. Also, as I think about moving, I get frustrated with the crazy assortment of pastas I have stuffed in the back of the pantry. Two separate bags of, half used orzo, two versions of penne and enough spaghetti to feed a village. So this allowed me to get rid of the remainders of a penne bag as well!


cheesy penne pasta bake
{ingredients}
1 cup penne pasta, cooked according to package directions
1/2 c. reserved pasta water
1/4 to 1/2 lb ground turkey, cooked and finely crumbled
tomato sauce:
1 14oz can crushed tomatoes
2 T. olive oil
2 bay leaves
1/2 yellow onion, chopped
3 cloves garlic, crushed
1 tsp. Italian seasoning
cheese sauce:
1 T. butter
1 T. flour
5 - 6 oz milk
1/4 t. cayenne pepper
1/2 t. pepper
3/4 c. cheddar cheese or other sharp cheese
1/4 c. bread crumbs
{directions}
Heat olive oil in large skillet or saucepan with lid. Cook onions covered with one bay leaf, about 10 minutes. Add garlic and stir briefly. Add tomatoes, seasonings and reserved pasta water. Allow to simmer about 25 minutes until visibly reduced. Add salt, pepper and italian seasonings to taste. Remove bay leaf.
Make the cheese sauce. I found a rubber whisk worked better than a metal one had. In pot that you made the pasta in, melt butter on medium heat with second bay leaf until bubbly. Add flour and whisk until smooth and slightly darkened in color. Remove bay leaf. Add about 1/3 of the milk and whisk until smooth. Slowly add the rest of the milk and whisk. Whisk until thickened and coats the back of a spoon. Remove from heat and gradually whisk in all but 1/4 cup of the cheese, allowing each addition to melt. Add spices.
In a small baking dish (I used what I think was about a 9 X 5 pyrex) combine pasta, ground turkey, half of the bread crumbs, and all but about a 1/4 of the cheese sauce. Spread the rest of the cheese sauce on top, sprinkle with remaining cheese, remaining bread crumbs and some cracked black pepper. Bake on 350 for about 25 minutes.

{photo belongs to kraft as i'm too lazy to upload mine!}