Sunday, January 13

Maple Almond Granola

I love granola, and when I received Peace Meals for Christmas, the recipe for peanut butter granola caught my eye. Granola is too good because it typically is healthy oats coated in loads of sugar and oils. I was intrigued that this recipe used all peanut butter as an efficient-protein packed oil. As I researched more recipes online, I ended up opting for an almond and maple twist on a peanut butter and honey granola recipe I found online. Next time, I will try it with all almond butter and no olive oil. Next time I make peanut butter, I'll certainly be trying the original peanut butter and honey version.


MAPLE ALMOND GRANOLA

adapted from eat sleep cuddle {photo cred} and Peace Meals
{ingredients}
2 1/2 cups old fashioned oats
3/4 cup wheat germ or wheat bran
1/2 tsp sea salt

1 tsp cinnamon1/4 cup olive oil
1/4 cup maple syrup

1/4 cup honey1/4 cup [fresh/all natural] almond butter {make your own with a food processor!}
1/2 tsp vanilla

--
 1 1/4 c raisins
maple syrup
cinnamon
{directions}
Mix together dry ingredients, then add wet and mix together. Spread out on parchment paper on a baking sheet. Bake at 300 degrees for about 20 minutes (it will get golden brown around the edges).  While it's baking, toss raisins with a few shakes of maple syrup and cinnamon. Once granola is finished, let cool completely, until the granola has set. Break up gently and combine with raisins in a bowl or jar with tight fitting lid. 

Wednesday, August 1

Caramelized Onion + Eggplant Pizza

More CSA dinner bounty! I made this galette-looking pizza from all from stuff I had at home plus the vegetables from my box. I used a big Galine eggplant, small purple "candy apple" onion and a yellow ringo pepper. The onion, pepper, garlic, salty goodness totally made the pizza and perfectly complimented the soft, creamy eggplant. I was grateful for Epicurious' inclusion of peppers; as a result, I was inspired to throw one of the peppers in the skillet and am so glad I did!


{Caramelized Onion + Eggplant Pizza}
adapted from Epicurious
INGREDIENTS
1/2 of this pizza dough
1 chinese eggplant or 1/2 of a large globe eggplant (to make 8-10 thin slices)
1 T. olive oil
2 t. coarse sea salt
1 small onion, cut in thin strips
1 small mild pepper, cut in thin strips
1 t. minced garlic
1/4 c. pesto
1/3 c. shredded mozzarella
1/4 c. shredded parmesean
cracked pepper
DIRECTIONS
Broil eggplant: Cut eggplant into 1/4 inch-thick rounds and arrange in 1 layer on a foil-lined large baking sheet. Lightly brush both sides with oil and season with salt. Broil 2 to 3 inches from heat until golden brown and tender, about 4 minutes. Heat oil in a small cast iron skillet over medium heat, gently sautee onion and pepper along with coarse salt, until soft and then browned and fragrant. Add minced garlic once onions begin to brown. Once completed, remove from heat.
Preheat oven to 500°F. Shape and stretch dough into 12- to 13-inch round. Spread pesto and half of mozzarella chese. Cover with eggplant, overlapping it, and sprinkle with remaining cheese. Spoon evenly over eggplant. Fold crust over about 2 inches all the way around, like a galette, if you're feeling creative. Bake pizza until dough is crisp and browned about 9 - 10 minutes. Top with cracked pepper.


This morning I used the rest of the squash including the cute sunburst squash to make zucchini bread. Whew! Veggie overload! Fortunately my next box isn't coming until the 22nd.


Tuesday, July 31

{Dal with vegetables} from Bittman's Food Matters Cookbook

We ventured into Indian territory today thanks to my new Food Matters cookbook from Mark Bittman and my first CSA bounty from Johnson's Backyard! I had lentils I'd been trying to come up with something to do with as well as TONS of cauliflower. My CSA box had two kinds of squash, two kinds of eggplant and some darling onions. So when I saw this recipe, it seemed a perfect fit! I used long eggplant (what may be Chinese) and yellow squash for this. I'm saving my big, globe eggplant, my pattypan squash as well as some of the peppers for roasted ratatouille


Dal with lots of Veggies
{INGREDIENTS}
1 T. butter
1 T. olive oil
1 c. chopped onion
1 T. minced garlic
1 tsp. ground ginger
1 c. cubed eggplant, bite sized
1 c. cubed squash, bite sized
1 c. bite sized cauliflower florets
1 c. lentils
2 T. garam masala
2 cloves
pepper
salt
cilantro
{DIRECTIONS}
Heat oil and butter in large, heavy bottomed pot on medium. When butter is melted add ginger, onions and garlic. Sautee until soft, about 5 minutes. Remove garlic and onion mixture from pot and increase heat to medium high. Add cauliflower and satuee until browned 5-10 minutes. Remove cauliflower and reduce heat to medium. Add eggplant and squash and brown, about 5 minutes. {do all this browning at once if your pan is big enough} Return cauliflower and onion, garlic mixture to pot. Add garam masala, some generous shakes of pepper and cloves, along with lentils, stir about a minute. Add enough water to cover ingredients by an inch. Bring to boil then reduce heat so contents are gently bubbling, cover and cook 25-30 minutes until lentils are tender. Add more water if necessary. Should be saucy but not too watery. A thick soup or something that could also be served on rice or pita bread.


Yum!

Friday, June 8

grilled skewers

I love vegetables. My husband loves meat. I had been wanting to do skewers since, well, last summer when I bought some metal skewers.

We called these shish-ka-bobs growing up. It was a super easy very flavorful and flexible summer meal. Surprisingly, this was my first meal to ever grill myself. I was really proud of myself. Next up: grilled pizza.

Summer Skewers on the grill
makes eight skewers {or five skewers plus about 4 cups side veggies in a grill basket}
INGREDIENTS
1 squash
1 zucchini
2 cups sliced mushrooms
1 onion
2 heads garlic
1 red bell pepper
1 green bell pepper
1 chicken breast (or more if you don't want to have just veggie skewers. Next I want do shrimp.mmmm.)
1/4 c. olive oil
2 t. pepper
Old Bay Seasoning
seasoning salt
DIRECTIONS
Heat grill to medium, somewhere between 300 and 350. Slice all vegetables. See pic above. Peel garlic into individual cloves. Toss vegetables and garlic cloves with olive oil, pepper, a few dashes of seasoning salt and generous amounts of Old Bay Seasoning, maybe 1-2 tablespoons. Cut chicken into bite sized pieces and sprinkle with Old Bay. I'd allow this to marinate in something if I'd had the forethought.

Skewer everything in a fun alternating pattern. Be sure each skewer gets a clove of garlic or two. Be sure that you hog the mushrooms for yourself. I made sure as many cloves, onions and peppers were touching the chicken pieces as possible.


Grill for about 35 minutes, depending on the heat of your grill.

I tossed some corn with old bay and olive oil and put that on the grill as well along with the extra veggies in a basket. It was awesome and great the next day too!


yay!


Friday, January 6

Winter Slaw Salad with Orange Tahini Dressing

Bartlett's has an Asian salad that I really like involving mint, mango and avocado. When I saw a winter slaw recipe calling for a tahini orange dressing, I decided to make something similar because I have a jar of tahnini, oranges and orange juice crying out to me from the fridge. 

We had this with a chicken and broccoli dish: 
I marinated pieces of chicken in an Asian marinate then stir fried them in 2 tablespoons of peanut oil. Pulled the chicken out once cooked. 
Added to the same pan about a cup of broth and about 2 cups each broccoli florets and halved brussels sprouts along with 2 teaspoons each garlic, fresh grated ginger and red pepper flakes, scraping up the meat pieces and stirred. 
Simmered until cooked and liquids reduced. 
Tossed it all back with the chicken and about 1/4 cup soy sauce!

This dressing was really good and this salad has a great variety of textures and flavors. It tastes really fresh but hearty at the same time with the tahnini dressing. Which is technically why it's called a slaw, I believe. Taylor would not have eaten it had I called it a slaw, however.

Winter Slaw Salad with Orange Tahini Dressing
adapted from My New Roots, to whom the picture belongs.
Ingredients:
2 cups each shredded Savoy cabbage, purple cabbage, kale (I only did purple cabbage, about 3 cups)
2 cups shredded carrots
2 scallions, finely sliced
½ cup chopped flat leaf parsley
½ cup chopped mint
½ cup slivered almonds
1 orange, cut into bite sized pieces (mango would be ideal but I have oranges coming out my ears... it was great)
3 T. roasted sesame seeds or even better an Asian Spice Mix (such as Adams Reserve Asian Spice rub which is a mixture of sesame seeds, garlic, sweet pepper, red pepper and green chili pepper flakes, turmeric and garlic)

Tahini Cream Dressing with Orange
Dressing:
Makes 1 cup
2 Tbsp. olive oil
2 Tbsp. lemon juice
1 Tbsp. orange juice
1 Tbsp.  agave or honey
1/3 cup tahini
2 Tbsp. water
1 teaspoon white wine vinegar
a couple pinches of salt
zest of 1 orange

Directions:
Combine herbs, nuts, fruit, shredded cabbage, kale and carrots in a large bowl. Whisk dressing ingredients together (or shake up in a jar). Add water to thin to desired consistency. Toss desired amount of dressing with salad once you're ready to serve. Garnish with extra parsley, mint and sesame seeds.

This dressing would be good over soba noodles too.

Sunday, January 1

bagels

I love bagels and have been wanting to make my own for a while. In keeping with my resolution to try to bake more bread, I went for it yesterday! I tried it with some heartier flours and as a result, I think I should have been more patient with the rising time {winter day + denser flours} and done a bit more research as to how the dough is supposed to feel after kneading. I let them start their rising without getting the dough to a supple stretchiness. Adding a bit more water during the kneading process would have fixed this easily, but I wasn't sure how the dough was supposed to compare to the feeling of pizza dough that I'm used to. I'm thinking it should feel as supple as pizza dough because mine were still pretty dense after rising, which then affected how well they baked.


Homemade Bagels
Adapted from Artisan Breads Every Day by Peter Reinhart and BGSK
Makes 6-8 bagels

You can find barley malt syrup at a specialty foods store or Whole Foods.

Ingredients
For the dough:
1 tablespoon barley malt syrup, honey, or rice syrup
1 teaspoon instant yeast
1 ½ teaspoons salt, or 2 ½ teaspoons coarse kosher salt
3 ½ cups (16oz) unbleached bread flour (or other flour by weight. I did about 4oz rye and 8oz bread flour and 4oz whole wheat flour

For the poaching liquid:
1 ½ tablespoons barley malt syrup, honey, or rice syrup
1 tablespoon baking soda
1 teaspoon salt, or 1 ½ teaspoons coarse kosher salt


Stir the malt syrup, yeast, and salt into 1 cup plus 2 tablespoons lukewarm water. Place the flour into a mixing bowl and pour in the malt syrup mixture. Use a large, sturdy spoon and stir for about 3 minutes, until well blended. The dough should form a stiff, coarse ball, and the flour should be fully hydrated; if it isn’t, stir in a little more water. Let the dough rest for 5 minutes.

Transfer to a very lightly floured work surface and knead. The dough should be stiff yet supple, with a satiny, barely tacky feel. If the dough seems too soft or overly tacky, mix or knead in a little more flour.
I did this all in a stand mixer with the dough hook, about 8 minutes.

Place the dough in a clean, lightly oiled bowl, cover the bowl tightly with plastic wrap, and let the dough rise at room temperature for 60-90 minutes. Patience is key.


Prepare a sheet pan by lining it with parchment paper, then misting it with spray oil or lightly coating it with oil. Divide the dough into 6 to 8 equal pieces.

Form each piece into a loose ball by rolling it on a clean, dry work surface with a cupped hand. Holding the dough with both thumbs in the hole, rotate the dough with your hands, gradually stretching it to create a hole about 2 inches in diameter.

Place each shaped bagel on the prepared sheet pan, then mist with spray oil or brush with a light coating of oil. Cover the entire pan with plastic wrap and let rest 10 minutes

Fill a pot with 2 to 3 quarts of water, making sure the water is at least 4 inches deep. Cover, bring to a boil, then lower the heat to maintain at a simmer. Stir in the malt syrup, baking soda, and salt.

Gently lower each bagel into the simmering poaching liquid, adding as many as will comfortably fit in the pot. They should all float to the surface within 15 seconds. After 1 minute, use a spoon to turn each bagel over. Poach for another 30 to 60 seconds, then use the spoon to transfer it back to the pan. 

Transfer the pan of bagels to the oven, then lower the oven heat to 450°F.

Bake for 8 minutes, then rotate the pan and check the underside of the bagels.  Bake for another 8 to 12 minutes, until the bagels are a golden brown. Cool on a wire rack. 

Image belongs to Smitten Kitchen who has a similar albeit more complicated version of Peter R's bagels. There was no way I was going to attempt bagels for the first time with all that business. Too daunting to attempt. This was simple and I was quite happy with the result and what I learned. I plan to keep working on them and will keep you posted.

By the way, this is helpful baking advice. ... because I freeze butter too and yet am also an impulsive baker.

Saturday, October 29

Roasted Tomato Basil Soup

This was so good and perfect for the recently cooler weather! I could have eaten the roasted tomatoes straight off of the baking sheet.
Roasted Tomato & Basil Soup
recipe & bottom image from SpoonForkBacon
Makes 7 cups 
INGREDIENTS
1 ½ lbs Roma tomatoes, sliced lengthwise
3 tablespoons extra virgin olive oil
2 tablespoons unsalted butter
1 medium yellow onion, diced
4 garlic cloves, minced
1 tablespoon fresh thyme, minced*
1 (28 ounce) can crushed tomatoes
2 cups basil leaves, roughly chopped
2 tablespoons dried basil*
1 tablespoon sugar
2 cups low sodium chicken broth
salt and pepper to taste
2/3 cup heavy cream {I did not have cream. I mixed in about 4 oz cream cheese but thought it was great without it}
garnish:
basil
feta cheese, crumbled.
*I did have fresh basil but not fresh thyme or dried basil. I used extra fresh basil and about a 1/2 tablespoon Italian spice mix.
DIRECTIONS
1. Preheat oven to 375°F.
2. Spread tomato halves onto a baking sheet and drizzle with olive oil. Season generously with salt and pepper.
3. Roast tomatoes for about 1 hour.
4. While tomatoes are in the oven, melt the butter in a large pot over medium-high heat.
5. Add onion and sauté for 5 minutes.
6. Stir in the garlic and thyme and sauté for another 5 minutes.
7. Add crushed tomatoes, basils and sugar. Season with salt and pepper.
8. Stir the mixture and reduce the heat to medium or medium-low and simmer for 10 minutes, covered.
9. Pour broth and roasted tomatoes into the pot. Season with salt and pepper.
10. Continue to simmer soup, covered, for about 30 minutes, stirring occasionally.
11. Carefully pour soup into a blender and blend until smooth. {Immersion blender party! Get one!}
12. Pour soup back into the pot and stir in the cream until fully incorporated.
13. Simmer the soup for 3 minutes before ladling into bowls.
14. Top each soup with a sprinkle of feta cheese and basil and serve hot.

Monday, September 19

asian haricot vert salad

Just threw together a yummy and easy modification of this salad.  Serving this with pork tenderloin, marinated in a Ginger Lime Vinaigrette marinade, seared briefly on high heat on all sides in an ovenproof skillet then baked till 145 degrees. Reducing leftover marinade in the same skillet mixed with some spicy mustard for a sauce.

Asian Dressing to coat 3 to 4 cups steamed fresh green beans
whisk together:
2-3 teaspoons champagne vinegar
2-3 teaspoons olive oil
2-3 teaspoons spicy mustard
a few dashes of pepper and coarse salt
1 teaspoon freshly grated ginger {hello cheap little tiny chunk from Whole Foods!}
1 tablespoon Asian Spice Mix (such as Adams Reserve Asian Spice rub which is a mixture of sesame seeds, garlic, sweet pepper, red pepper and green chili pepper flakes, turmeric and garlic)

good warm and also chilled!

Sunday, September 11

Eggplant Caponata

Another veggie dish! I had been wanting to cook eggplant more and try another, more summery way of cooking squash besides roasting it. Because I freeze my herbs, it wasn't a problem to use the fresh herbs this called for, and I knew the combo of sauteeing and balsamic vinegar had to be a winner.


My only beef with this recipe was that even though I reduced the portions to about 2/3 of the recipe, I still couldn't do it all in one skillet. Next time I'll make a smaller quantity or just use the same skillet twice rather than having two going simultaneously.


You don't have to use heirloom tomatoes --they're pricey. I used one heirloom tomato and one really ripe beefsteak tomato. This dish alone would have cost about 12 bucks had I bought two big heirloom tomatoes. Bet this would be a great dish to make after hitting up the farmer's market though!


Eggplant Caponata
from happyyolks
INGREDIENTS
1 lb eggplants {I used the long, skinny ones}
¼ cup olive oil
1 chopped yellow onion
2 cloves garlic, minced
2 large heirloom tomatoes, in chunks
3-5 yellow squash, into bite-sized chunks
2 cups crimini mushrooms, quartered
2 teaspoons balsamic vinegar {don't skimp!}
1 cup chopped flat-leaf parsley
1 cup chopped basil
salt and pepper, to taste

DIRECTIONS
Prepare the eggplant first by chopping the bulbs into bite sized chunks, and sprinkling with salt in a strainer. {Many chefs say this draws out the eggplant’s bitterness.} Let sit while you prepare the squash, tomatoes, onion, and mushrooms. In a heavy skillet over medium-high heat, add 2 tbsp of olive oil and minced garlic to simmer. Add eggplant cubes and cook for 10 minutes, stirring occasionally, until browned and soft. Remove from heat. In a second large skillet {or the same one} over medium heat, add the remaining 2 tbsp olive oil and simmer onions until barely translucent. Add squash and mushrooms, sprinkle with salt and pepper and saute for 5 minutes. Add the tomatoes last along with the balsamic vinegar and simmer for 4-5 minutes. Remove from heat. {I would have done this all in the same skillet had there been room.}


Stir chopped basil, parsley, and a dash of salt and pepper over all veggies. 

Friday, August 26

Roasted Cauliflower with almonds, lemon and parsley

By halving the recipe but doubling the nuts, I could almost have eaten this as a main dish. It's from Ina Garten's The Barefoot Contessa:How Easy is That? I'm putting the recipe as it appears in the book and noting my thoughts and changes. I really liked this, the nuts, parsley and lemon are simple but make it really flavorful. I appreciated the mixing it all in the sheet pan plan, since I'm averse to making more dishes dirty than necessary. 


This just came about serendipitously when I saw cauliflower at the store and realized I hadn't had it in forever...took it home with no other plan aside from throwing it in my salads raw. Then I found this recipe, and am really glad I tried roasting something new. I think it's a good summer veggie roast.


Roasted Cauliflower
serves 4-6 {I halved this, except the nuts and lemon juice}
Ingredients
1 head garlic, cloves separated but not peeled
1 large head cauliflower, trimmed and cut into large florets
4 1/2 tbsp olive oil
2 1/2 tsp kosher salt
1 tsp ground black pepper
1/4 cup finely chopped flat-leaf parsley {chop then freeze! then thaw the amount you want on a paper towel for a few min}
3 tbsp pine nuts, toasted (I used about 1/3c. slivered almonds, toasting them in a dry skillet on medium for about 2-3 min, til browned and fragrant)
2 tbsp fresh lemon juice (I used it from a bottle)
Directions
1. Heat oven to 450 degrees* F. Bring a small pot of water to a boil and add the garlic cloves. Boil for 15 seconds; drain and peel. Cut the largest cloves in half lengthwise.
2. On a rimmed baking sheet, toss the cauliflower with the garlic, 3 tbsp olive oil, 2 tsp salt, and black pepper. Spread into a single layer and roast, stirring twice, until the cauliflower is tender and the garlic is lightly browned, 20 to 25 minutes*.
3. Transfer the cauliflower to a large bowl with the garlic and pan juices. Add the remaining 1 1/2 tbsp olive oil, parsley, pine nuts, and lemon juice. Sprinkle with 1/2 tsp salt, toss well and serve hot or warm. Serves 6.
*{note} This burned my garlic. Maybe I boiled them too long. Or maybe they were too small. I don't know if that boiling step was just to make them easier to peel (which was cool) or if it was to blanch them and get them cooking, fragrant a bit. It wasn't worth bringing a pot to boil for just easy peeling and I don't actually like eating entire heads of garlic even when they're not burned. I may chop the garlic when I try this again, or even use garlic powder (is that bad?) Watch it as it cooks if you do it Ina's way, because surely she knows what she's doing. Or consider roasting on 425 or 400.
{pictures credit} because her images were much better than mine.

Tuesday, August 16

balsamic haricot vert salad

Green beans caught my eye at the store today. I think I'd been subconsciously dwelling on their fresh simplicity since enjoying a salad from a cute french bistro in Spokane last week. They were on sale and looked fresh, green and easy, so I grabbed a handful.


I could have put any sort of chopped toasted nuts in this. Maybe I'll do it again with chickpeas or fava beans. Anyway, this was easy and good.
And I was happy to bust out my shamefully neglected steamer insert. Really, I should use this thing more. Clean up is a breeze too.


balsamic haricot vert salad
let's use the french name for kicks.
serves 2
INGREDIENTS
2-3 cups fresh green beans
{addition suggestion} pine nuts, slivered almonds, finely chopped pecans toasted on medium high in a dry skillet, stirring often 3-4 minutes until browned and fragrant


{dressing}
1 tablespoon olive oil
1 tablespoon balsamic vinegar
a couple generous dashes of pepper and garlic powder
a dash of ginger
2 teaspoons spicy mustard {the stuff with horseradish}


DIRECTIONS
Steam beans until cooked and tender but still maintaining a bit of a crunch, about 4-5 minutes. Toast nuts if you're using them. Whisk together dressing ingredients. Toss  dressing with beans, nuts and whatever else you feel like throwing in there. Good warm. Good cold.

Wednesday, July 13

stuff your salad in a tomato

Tomatoes are huge and inexpensive right now, and I've been looking for ways to mix up my habitual lunch salad with toppings like tuna and a bunch of different types of beans, but when I picked up a Runner's World magazine while I was at the airport this weekend, I was inspired by a bunch of their great recipes. Who knew they'd have recipes? Guess I shouldn't be that surprised, but I was quite impressed.... 


Among other healthy, fresh, balanced and light recipes was one for a stuffed tomato. I found a bunch of varieties on stuffed tomatoes when I went to Runner's World's site to look for the recipes ones I'd seen in the magazine and now plan to chop up my salads and try a few of these variations among others on their site. Maybe they will come up with a cheap {and non-clutter causing}Nook version of the mag so I don't drown us in magazines saved merely for their recipes. Image belongs to foodstuff, who also has a great looking recipe.

Saturday, June 25

farmer's market lunch. farmer's market salsa


I've been making my own salsa recently. I use it sometimes as salad dressing and sometimes when I make a couple corn tortilla chips for a midafternoon snack. I've used canned diced tomatoes because I had tons of them, but it's obviously great with higher quality tomatoes, especially those that are about to be a little too ripe to enjoy on your salad. 

The farmer's market today was crazy with peppers, tomatoes, cucumbers and of course peaches. One stand was giving away cucumbers! Sliced salted cold cucumbers is one of my favorite summer snacks so I will certainly be enjoying that this week...

I had a little over a pound of tomatoes in my bag so they threw in a handful more to make it at least 2 pounds, though I'm sure it was more, and gave it to me for an even $2. I will be baking them in big slices, maybe attempting a summer tomato feta tart similar to this one, this one or this one, and of course eating them raw with salt and pepper and enjoying them in this salsa I just made. Yessss.

Salsa is flexible. Throw in whatever you have. I had onions and tomatillos already so I used:

the ripest tomato in the lot + one and a half tomatillos + a fourth of a large white onion. I also seeded and added half a jalepeno + a half a serrano pepper + fourth of a poblano pepper. Plus a dash of white vinegar + a dash of lime juice + a few generous sprinkles of salt. 

Process it all in a food processor. Eat.

It turned out pink! I really like the taste of tomatillos in salsa, Chuy's uses them. When I asked about cilantro, they said it's dried up in the heat, as had mine. So no cilantro in my salsa.


If you've never shopped a farmer's market, you're missing out! If nothing go for the experience. It's really fun to see and talk to the people who live and work around the food they produce. Oftentimes families are there selling their goods. You'll find great fresh juices and baked goods such great breads and baked goods handmade soaps, cheeses, herb mixes, candles. Samples of it all galore and of course great produce. I think a gentleman literally gave me the equivalent of a loaf of bread in all his variety of samples he was enthusiastically explaining and handing out. So fun. 

Some of it may be more expensive than the grocery store, cantelopes and watermelons were today, but a lot of it isn't and it's all much better and more fresh, my huge $2 bag of tomatoes, $5 bin of peaches and $2 bunch of kale for example. Plus it's fun to support the people who grow food locally and now that it's moved right down the street from me, I need to go more. I'm suuuuper excited about my farm fresh eggs! They were $5 a dozen, though, so part of me hopes I don't like them too much...

Monday, June 20

Pan Roasted Pork Tenderloin + Veggies

 My husband is the master of last minute dinner decisions. My freezer and I have become fast friends. I use my cast iron skillet to cook a variety of frozen vegetables often. For our anniversary, I did a one skillet pork tenderloin and vegetables. Marinating for a long time, searing well on all sides and removing when it was @ 145 degrees made for a great, tender piece of meat with a yummy, shreadable, well seared outside. Plus, can't beat that one pot clean up business. Especially when it's a cast iron skillet, I literally rinse it and wipe it clean.


ONE Pan Roasted Pork Tenderloin and Veggies
INGREDIENTS
1 medium sized pork tenderloin {I'm sorry, I truly have no clue how many pounds ours was...}
a thick Asian dressing or marinade of choice. I used Cookwell & Company Asian Ginger Vinaigrette.
3 cups frozen vegetables such as brussels sprouts, broccoli florets, or green beans
2 tablespoons olive oil {learned that extra virgin is not ideal for skillet cooking because it burns at a lower temperature. find just olive oil for skillet cooking. HEB makes some that’s labelled for sautéing.}
Cracked pepper
Coarse kosher salt
balsamic vinegar

DIRECTIONS
Trim ends off of tenderloin so it is uniform thickness. Cut in half. Marinate in the fridge overnight, well coated. Remove from fridge 30 minutes prior to cooking and pat dry.
 
Thaw vegetables by running warm water over them in a colander or allowing them to sit about 5 minutes in warm water. Cut the brussels sprouts in half. 

Preaheat oven to 425 degrees. Film an ovenproof skillet with oil and sear the tenderloin over medium high heat to brown all sides, about 5 minutes in all.

At the same time meat is browning, add vegetables and generously sprinkle with pepper and salt. Lower heat if things get splattery. Stir to coat and allow to sit undisturbed as meat browns, only stirring once or twice. Sprinkle balsamic vinegar over the vegetables and toss to coat.

Place skillet in the oven and roast 15-20 minutes until internal temp is 145 degrees. Tent skillet with foil and let rest about 5 minutes. Use more of your marinade as a glaze or make a pan sauce by deglazing the skillet with chicken broth, wine or something like orange juice.

Here's the basic recipe I use to cook vegetables @ the last minute.
Just Freezer Skillet Veggies
INGREDIENTS
3 cups frozen vegetables such as brussels sprouts, broccoli florets, or green beans
2 tablespoons olive oil {learned that extra virgin is not ideal for skillet cooking because it burns at a lower temperature. find just olive oil for skillet cooking. HEB makes some that’s labelled for sautéing.}
Cracked pepper
Coarse kosher salt
balsamic vinegar

DIRECTIONS
Thaw vegetables by running warm water over them in a colander or allowing them to sit about 5 minutes in warm water. Cut the brussels sprouts in half. Heat oil in metal or cast iron skillet on medium high. Add vegetables and generously sprinkle with pepper and salt. Lower heat if things get splattery. Stir to coat and allow to sit undisturbed about 2-3 minutes. Stir again and leave alone for a few more minutes. Once they are looking cooked, sprinkle with balsamic vinegar, stir to coat and cook about 2 -3 minutes more, stirring infrequently to allow maximum, flavorful browning.

Remove from heat. Cool. Plate. Sprinkle with a bit more salt and pepper.

Thursday, June 16

almost no knead bread

Bread strikes again. I've been eating this for two days straight. Toast a slice. Little honey. Little butter. Best crust and super moist. probably because I accidentally tripled the beer. Which should go to show you that bread is forgiving. You can't screw it up. It will probably be different every time depending on how long and at what temperature it rose, but it will always taste good. Especially right out of the oven.

 
Best when baked in a dutch oven. Best way to get heat and steam needed for good rise and the perfect crust.
almost no-knead bread
makes one delicious loaf. from america’s test kitchen via pete
INGREDIENTS 
3 cups unbleached all-purpose flour (15 oz), plus additional for dusting work surface I used bread flour
1/4 tsp instant or rapid-rise yeast (or 1/2 tsp dry active yeast)
1 1/2 tsp table salt
3/4 cup plus 2 Tbsp water (7 ounces), at room temperature
1/4 cup plus 2 Tbsp mild-flavored lager (3 ounces) {I accidentally used 3/4 cup + 2 Tb! Used Shiner's Black Lager. The dough was crazy sticky and hard to manage but it turned out fine and was super moist. May never try it the right way...}
1 Tbsp white vinegar
DIRECTIONS
whisk flour, yeast, and salt in large bowl. add water, beer, and vinegar. using rubber spatula or a wooden spoon, fold mixture, scraping up dry flour from bottom of bowl until shaggy ball forms. cover bowl with plastic wrap and let sit at room temperature for 8 to 18 hours.

lay 12- by 18-inch sheet of parchment paper inside 10-inch skillet and spray with nonstick cooking spray. transfer dough to lightly floured work surface and knead 10 to 15 times. shape dough into ball by pulling edges into middle. transfer dough, seam-side down, to parchment-lined skillet and spray surface of dough with nonstick cooking spray. cover loosely with plastic wrap and let rise at room temperature until dough has doubled in size and does not readily spring back when poked with finger, about 2 hours.

About 30 minutes before baking, adjust oven rack to lowest position, place 6- to 8-quart heavy-bottomed dutch oven (with lid) on rack, and heat oven to 500F. lightly flour top of dough and, using razor blade or sharp knife, make one 6-inch-long, 1/2-inch-deep slit along top of dough. carefully remove pot from oven and remove lid. pick up dough by lifting parchment overhang and lower into pot (let any excess parchment hang over pot edge). cover pot and place in oven. reduce oven temperature to 425F and bake covered for 30 minutes. remove lid and continue to bake until loaf is deep brown and instant-read thermometer inserted into center registers 210 degrees, 20 to 30 minutes longer. carefully remove bread from pot; transfer to wire rack and cool to room temperature, about 2 hours.


If you note that mine has a weird shape, it's because I did not have parchment paper so I used my Silpat mat. The sturdiness probably helped my gooey dough. Further proof that you can't mess it up. Try it!

Wednesday, June 15

french baguettes

I made bread and it was heavenly. It made my house smell great. It was killer straight out of the oven, with butter and honey, and now I'm hooked. I can't figure out what website this recipe came from, but I just printed nearly every bread recipe over at pete bakes and can't wait to try them all. I've come a long way and so can you! Do not be scurred.


{french baguettes}
adapted from artisan breads every day by peter reinhart
INGREDIENTS
5 1/2 cups unbleached bread flour
2 tsp salt or 1 tbsp kosher salt
2 1/4 tsp instant yeast
2 c. lukewarm water {about 95 degrees. Tap water that feels just warm to the touch is fine}
DIRECTIONS
{prep day} combine all ingredients in bowl of mixer with paddle attachment and mix on lowest speed for 1 minute until well blended and smooth. Dough should form a coarse, shaggy ball. Let rest uncovered for 5 minutes. Switch to dough hook and mix on medium low speed for 2 minutes. Dough should be smooth, supple and tacky but not sticky.

Knead dough by hand on lightly floured work surface for 1 minute, then transfer to a large, clean, lightly oiled bowl. Cover with plastic wrap and immediately refrigerate overnight or up to 4 days.

{baking day} remove dough from refrigerator 2 hours prior to baking. Gently transfer to lightly floured work surface. Divide dough into 10 ounce pieces for baguettes. Just divide the dough in fourths if you don't have one but Yes! I bought a $7 kitchen scale for this. I had four 10 ounce balls and then a little 5 ounce one leftover.

Form baguettes: by batting each piece of divided dough into a thick rectangle. With the long end facing you, fold the bottom half to the center and seal the seam. Fold the top half to the center and once again seal the seam. Roll the top half of the dough over the seam to create a new seam on the bottom of the loaf. Rock loaf back and forth with hands moving out toward and increasing pressure at the ends, to slightly taper the loaf until baguette is length of your baking sheet (or baguette pan if you have one).

Mist top of dough with spray oil, loosely cover with plastic wrap and proof and room temperature. Make a "couche" by placing baguettes on a clean towel dusted with flour, bunching up fabric between each loaf to create walls for support. Proof for about 1 1/2 hours or until they have increased to  1 1/2 times their original size.

Prep for baking: About 45 minutes before baking, preheat oven to 450 degrees. Place a rimmed sheet pan which will serve  as the steam pan on the shelf under which the baguettes will be baked. Remove plastic wrap from the dough 15 minutes prior to baking. Gently roll dough onto baguette pan or baking sheet. Just prior to baking score the dough 1/2 inch deep with a serrated knife. Transfer loaves to oven, pour 1 cup hot water into steam pan. Wear an oven mitt & be careful, the steam will be steamy in the hot pan. Warmed the water in my stovetop kettle and poured it in so there was some distance.

Bake for 12 minutes, then rotate pan and bake for another 15-25 minutes until the crust is rich golden brown and the loaves sound hollow when thumped, and the internal temperature is about 200 degrees. Coll on a wire rack for at least 35 minutes before slicing or serving. good luck with that. Store wrapped in a dish towel to maintain crust's crispiness.

Thursday, June 2

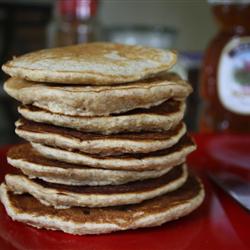
banana bunchaheartysoundingstuff pancakes

This is what I made for breakfast this morning. If you're a light, fluffy buttermilk pancake person, sorry. These were fluffy for sure, but they're more on the hearty side. By now you surely know about the seriousness with which I approach my breakfasts. In my opinion frozen bananas, frozen right when they're turning brown and would be just a bit too overripe to eat, are best for baking. I set these out to thaw for about an hour and a half then peeled them into the bowl. Trying not to think about how slimynasty they looked...They're so easy to mash and provide a bit more moisture to a recipe like this with a bunch of dense stuff. Anyway, these are filled with protein and fiber. Check out how good for you wheat germ is. But the banana and agave nectar I tried out as syrup provide ample sweetness and flavor, in my book at least.


And you must sing the song of course.

Erin's Banana flaxbranoatwheatandbunchaheartysoundingstuff Pancakes
adapted from here and here.
INGREDIENTS
2/3 cup old fashioned oats
1/3 cup whole wheat flour
3 T. wheat germ
1 c. milk I used almond milk bc that's what I had.
3 t. flax seeds
2 t. baking powder
1/4 t. baking soda
1/4 t. salt
1/2 t. cinnamon
1 t. vanilla extract
1 egg beaten
2 very large, very ripe bananas, mashed well (or thawed from frozen is better)
2 T. olive oil
DIRECTIONS
In a cup or small bowl, pour 1/3 cup of your milk over the wheat germ and let sit. Process the oats in a blender or food processor until they resemble a coarsish flour. Sift together flour, cinnamon, baking powder, soda & salt in to a large mixing bowl. Add oat flour. Sifting the w.w. flour helps it get fluffy and whole wheat tends to be more coarse anyway. (Once I run out, I'm getting whole wheat cake flour) supposedly that's the way to go to get your whole wheat flour baked goods to stay fluffy, less coarse, more similar to white flour. Whisk together beaten egg, banana, oil and vanilla until well combined. I beat my egg into my mushed banana, shhh don't tell, bowl minimization. Whisk in the soaking milk with wheat germ. Add dry mix, combine, and let sit for five minutes. Heat griddle or cast iron skillet to medium or medium low. It's ready when droplets of water bounce on it. Cook pancakes. They'll cook slower than regular pancakes. I kept my skillet on medium low, otherwise the outsides get to crisp before the middle is cooked. Add more milk or water if the batter gets too thick. Serve topped with peanut butter and agave nectar as syrup. yum.

Friday, May 6

roasted shrimp

Umb. I'm dumb. Where has this been? I'm sure I own the Ina Garten cookbook that it's in. As in, for the last three years this recipe {or rather this simple 8 minute interaction between a hot oven and four household staples} has been sitting in my kitchen, in painfully close proximity to the freezer which houses an old, colossal and overly ambitions, never ending bag of frozen shrimp.

Le Sigh. Despite the time it took, I'm so glad cute Little Kitchen could bring it to the forefront of my Google Reader so that at least, albeit feeling like an idiot, I could at least come out of the cave I've been living in, begin to enjoy this and make some more room in my freezer. Or maybe not since I'll probably go to Costco for an elephant sized bag later today.

This. Is. So. Good. So versatile. So stinkingfrikinannoyingly simple. Be generous with your oil, salt and pepper and use good olive oil. Eat these babies alone, chopped up on salads, thrown into summer pastas, make little ceviches.


Roasted Shrimp
via The Little Kitchen that Could {to whom the pic belongs} from Ina Garten
{Ingredients}
2 lbs. large shrimp (15-20 count), peeled and deveined with tails left on
3 Tablespoons olive oil
1 Tablespoon coarse kosher or sea salt
1-2 teaspoons freshly ground pepper
1 teaspoon Old Bay blackening seasoning is also good if you have it
{Directions}
If your shrimp were frozen, as mine were, easily thaw them by running them under lukewarm water in a colander or setting them in a bowl of lukewarm water for 5 minutes or so. They are then easy to peel if they aren't already.
Preheat oven to 400 degrees. Cover a baking sheet with foil. Toss shrimp with olive oil, salt and pepper and spread in one layer.  Roast for 8 minutes or just until pink and cooked through.  Set aside to cool.  Serve warm or at room temperature, on top of salads, mixed in pasta, or even in warmed corn tortillas with some fresh pico de gallo, cilantro, maybe some chopped mango, cabbage, and a little chipotle mayo.